
Grilling a steak to perfection is as much an art as it is a science. Yet, even among seasoned cooks, the reverse sear method stands out for its ability to create steaks with a juicy, tender center and a crisp, flavorful crust. Growing in popularity among both home cooks and professional chefs, the reverse sear steak technique addresses common pitfalls of traditional grilling by providing precise temperature control and reliable results.
While steakhouse-quality outcomes were once elusive for the home cook, methods like the reverse sear have democratized great flavor. In culinary forums and food blogs, this approach is lauded for its consistency and is increasingly recommended for pricey cuts like ribeye, filet mignon, and New York strip.
What Is the Reverse Sear Method?
Defining the Technique
Unlike the traditional method—which starts by searing the steak over high heat and then finishing it in the oven—the reverse sear flips the process. The steak is first gently cooked at a lower temperature, either in an oven or on a grill, before being finished with a quick, high-heat sear in a hot skillet or over flames.
This technique offers significant control over doneness and minimizes the risk of overcooking. Internal temperatures are more uniform, and the coveted golden-brown Maillard crust is achieved right before serving, locking in juices.
Why Chefs and Food Scientists Endorse Reverse Sear
Food scientists point to the ability of the reverse sear to reduce the overcooked “gray band” beneath the surface of the steak, producing a consistent doneness edge-to-edge. In popular culinary science texts, the reverse sear is celebrated for its superior results:
“By using gentle heat to bring the steak up to temperature, and finishing with a fast, high-heat sear, you gain the best of both worlds: precise doneness and an unmatched crust,” says chef and cookbook author J. Kenji López-Alt.
Step-by-Step: How to Make a Reverse Sear Steak
1. Selecting Your Steak
Choose steaks that are at least 1.5 inches thick; thicker cuts respond best to the slow, even heating. Ribeye, T-bone, porterhouse, and strip steaks are ideal candidates.
2. Season Generously
Pat the steak dry and season liberally with kosher salt and freshly cracked black pepper. Allowing the steak to rest, uncovered, in the refrigerator for an hour helps dry the surface, promoting better browning later.
3. Slow-Cook to Target Temperature
Place the steak on a wire rack over a baking sheet. Roast in a 225°F (about 107°C) oven until it reaches about 10–15°F below your target doneness:
– For rare: 115°F–120°F
– For medium-rare: 120°F–125°F
– For medium: 130°F–135°F
This typically takes 30–60 minutes, depending on thickness and initial temperature.
4. Sear for a Crusty Finish
Heat a cast-iron skillet over high heat until smoking. Add a thin layer of neutral oil, such as canola or grapeseed. Sear each side of the steak until a deep, golden crust forms—generally 45 seconds to 1 minute per side.
For added flavor, baste the steak with butter, garlic, and fresh herbs during the final moments of searing.
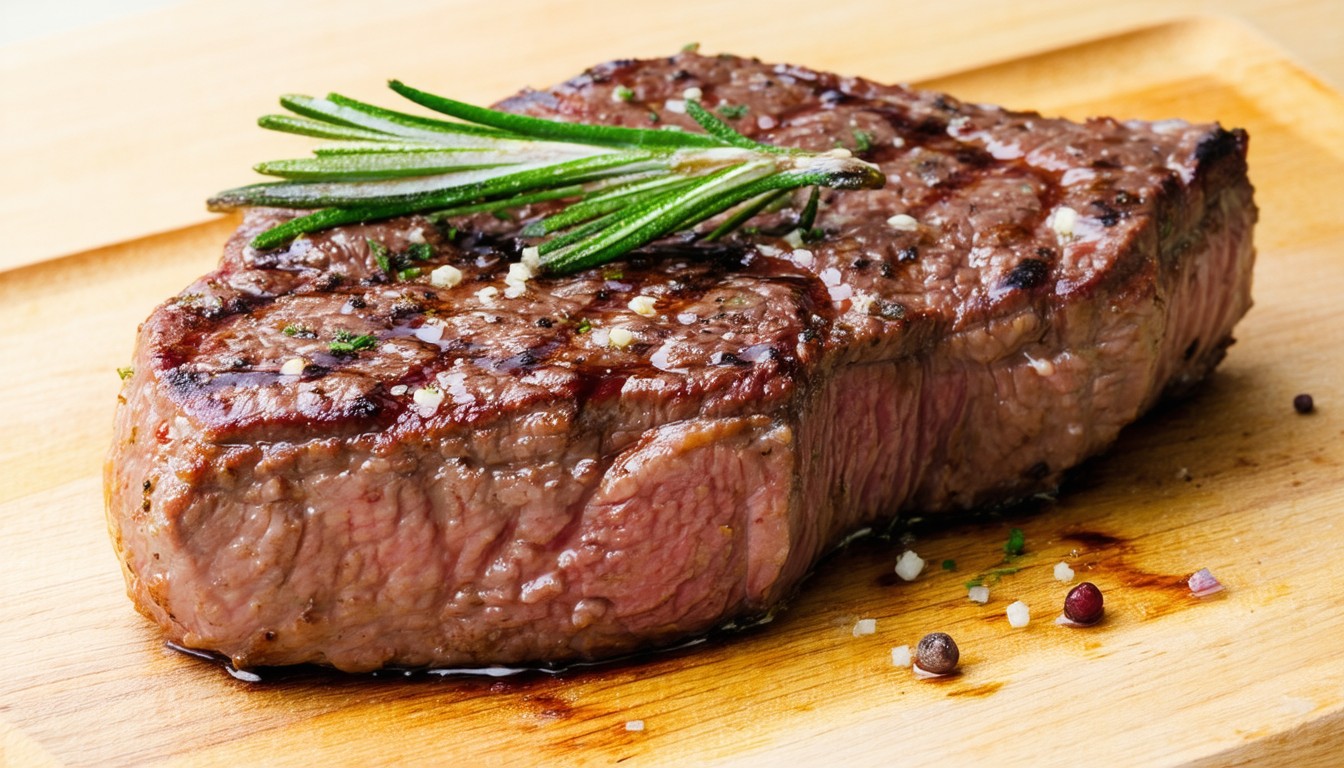
5. Rest, Slice, and Serve
Transfer the steak to a cutting board and let it rest for 5–10 minutes. This allows juices to redistribute for optimal tenderness and moisture. Slice against the grain and serve immediately.
Why Reverse Sear Works: The Science Behind Juicy, Even Steaks
Efficient Heat Transfer and Moisture Retention
Cooking at a lower temperature allows heat to penetrate the steak gradually. The proteins relax, moisture is retained, and overcooking is significantly reduced. This contrasts with traditional searing, where the exterior can overcook before the center is brought to the desired doneness.
The Maillard Reaction at Its Best
By finishing over high heat, the exterior rapidly undergoes the Maillard reaction—an amino acid and sugar interaction responsible for the savory flavor and deep brown color that steak lovers crave. Because the surface is dry and the internal temperature is already near-perfect, less time is needed to achieve that crust, reducing the risk of drying out the steak.
Real-World Context: From Steakhouses to Backyard Grills
Many high-end steakhouses and renowned chefs, such as Heston Blumenthal, have adopted reverse sear methods for thick cuts, citing control and consistency during busy service. Home cooks, too, have posted thousands of side-by-side photo comparisons on social media, often showing the more even doneness of reverse seared steaks compared to traditional pan-searing.
Tools and Tips for the Home Cook
Essential Equipment
- Meat Thermometer: Critical for ensuring your steak reaches the precise temperature.
- Oven or Grill: Even a basic oven suffices, though a smoker or covered grill offers additional flavor.
- Cast-Iron Skillet: Delivers even, high heat for the final sear.
Common Mistakes and How to Avoid Them
- Skipping the Rest: Always let the steak rest to prevent juices from spilling out when slicing.
- Overcrowding the Pan: Sear one or two steaks at a time to avoid steaming instead of browning.
- Neglecting to Dry the Surface: A wet steak will not brown. Pat thoroughly with paper towels before searing.
Beyond technique, experimenting with wood smoke, compound butters, or finishing salts can further elevate your steak’s flavor profile.
Conclusion: Elevated Steaks, Accessible Technique
The reverse sear steak method unlocks steakhouse-quality results in any kitchen. By separating gentle cooking and searing stages, it creates steak that is tender, juicy, and has an irresistibly crisp crust—every time. For home cooks seeking to master their next steak dinner, the reverse sear is a proven, reliable approach.
FAQs
What is the main benefit of reverse searing a steak?
Reverse searing produces more consistent doneness throughout the steak and a superior crust compared to traditional methods.
Can I reverse sear on a grill instead of an oven?
Absolutely. Indirect heat on a grill can replace the oven, and finishing over direct flame works well for the sear.
What is the best cut of steak for reverse sear?
Thicker cuts like ribeye, strip, porterhouse, or filet mignon work best, as they allow for even temperature control and a well-developed crust.
How long does the reverse sear process take?
Depending on steak thickness, the slow-cooking portion can last from 30 to 60 minutes, while the final searing takes just a couple of minutes.
Should I season the steak before or after the slow-cook?
Seasoning beforehand helps develop flavor throughout the steak and enhances the final crust during searing.
Do I need a special thermometer for this method?
A reliable digital meat thermometer is recommended to accurately monitor internal temperatures, ensuring perfect doneness.


Leave a comment